Introduction to Ski Binding Adjustment
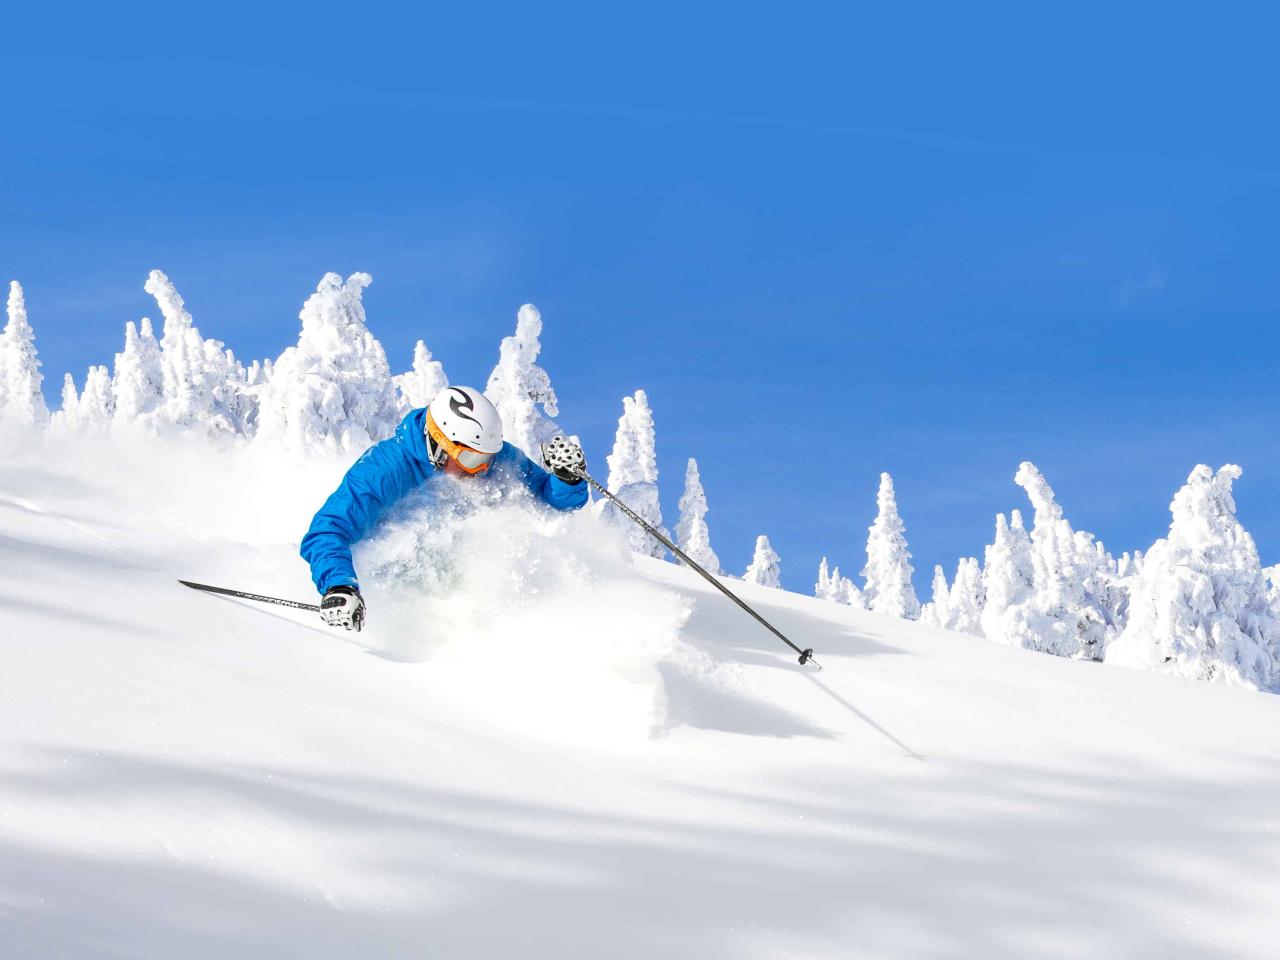
Ski bindings are crucial components of ski equipment, ensuring a secure connection between the skier and the skis. Properly adjusted bindings are essential for both safety and performance. They prevent unwanted disengagement during turns and landings, mitigating the risk of injury. Furthermore, optimized bindings enhance ski control, enabling skiers to achieve desired speeds and maneuvers with greater precision and efficiency. Correctly adjusted bindings contribute to a more enjoyable and safer skiing experience.
The basic principle behind ski binding adjustment lies in optimizing the interaction between the ski boot and the binding. This involves finding the correct settings to accommodate various factors like the skier’s weight, boot size, and intended skiing style. Understanding the interplay of these variables is vital for achieving a balance between security and freedom of movement. Adjusting ski bindings involves meticulously selecting the appropriate settings to match individual needs and preferences, ensuring both safety and optimized performance.
Binding Component Functions and Adjustment Impacts
Understanding the function of each binding component is paramount for safe and effective adjustment. The table below Artikels key binding parts, their functions, the impact of adjustment on performance and safety considerations.
| Part of Binding | Function | Adjustment Impact | Safety Consideration |
|---|---|---|---|
| Release Mechanisms (e.g., Toe, Heel) | Determine the point at which the binding releases from the boot, preventing injuries during a fall. | Adjusting the release settings impacts the forces required for the binding to release. Incorrect settings can lead to either excessive or insufficient release, potentially resulting in injury or loss of control. | Ensure that release settings align with the skier’s weight, experience level, and intended skiing terrain. Overly aggressive settings can lead to injury from a fall; conversely, settings too conservative might not provide adequate protection. |
| Buckles (e.g., Toe, Heel) | Secure the ski boot to the ski, maintaining a firm connection. | Tightening or loosening buckles impacts the boot’s stability and the force required for the binding to release. | Overly tight buckles can impede the natural movement of the foot and restrict blood flow, leading to discomfort. Conversely, loose buckles might not maintain secure connection, jeopardizing the skier’s safety. |
| Wedges (e.g., Toe, Heel) | Position the ski boot correctly within the binding and ensure the appropriate release angle. | Adjusting the wedges adjusts the release angle and the amount of force required to trigger the release mechanism. | Incorrect wedge settings can lead to improper boot alignment and a compromised release response. This might lead to an increased risk of injury. |
| Ramp/Ramp Angle | Adjusts the ski’s inclination to the ground for optimal ski performance and binding functionality. | Improper ramp angle might affect the release mechanism, and also cause uneven or unstable ski performance. | Skiers should ensure proper ramp adjustment to ensure that their skiing style is optimized. This can reduce the chances of binding failure and injury. |
Tools and Equipment Needed
Proper ski binding adjustment requires the right tools. Improper tools can lead to inaccurate adjustments, potential damage to the bindings, and even injury. Careful selection and maintenance of these tools are paramount to a safe and effective adjustment process.
Essential Tools
A comprehensive set of tools is necessary for precise and safe ski binding adjustment. This includes specialized tools designed to handle the specific components of the binding system. Failure to have the right tools can compromise the quality of the adjustment and potentially lead to problems.
| Tool Name | Description | Purpose | Safety Precautions |
|---|---|---|---|
| Binding Adjustment Wrench | A specialized wrench with specific shapes and sizes designed for ski bindings. Often features multiple sizes or interchangeable heads for different binding models. | Used for tightening and loosening the various components of the ski binding, including the heel and toe pieces. | Ensure the wrench is appropriate for the binding model. Use caution when applying force to avoid damaging the binding or the wrench itself. |
| Binding Removal Tool | A tool specifically designed to remove and install the binding components from the ski. This tool typically features a specialized head to grip and manipulate binding components. | Facilitates the removal and installation of the ski bindings from the ski. | Use caution when removing and inserting the bindings. Follow manufacturer instructions. Inspect the tool for damage before use. |
| Binding Alignment Tool | A tool used for checking and adjusting the alignment of the ski binding components. This may include gauges or indicators. | Ensures proper alignment of the binding’s components to the ski’s structure. | Consult the manufacturer’s instructions to ensure correct alignment for the specific ski binding model. |
| Measuring Tape or Caliper | Used to accurately measure distances and dimensions. | Crucial for ensuring precise adjustment based on individual ski boot size and rider characteristics. | Handle with care to avoid damage. Ensure the tape or caliper is in good working order and accurate. |
Potential Issues with Inadequate or Damaged Equipment
Using inadequate or damaged tools can lead to several problems.
- Inaccurate Adjustments: Incorrectly sized or damaged wrenches can lead to improper tightening or loosening of components, resulting in a binding that is not optimally adjusted to the rider’s weight and boot size. This can compromise the safety and performance of the ski equipment.
- Binding Damage: Over-tightening or using a tool not appropriate for the binding model can damage the binding’s internal mechanisms, rendering the ski unsafe for use.
- Safety Concerns: Improperly adjusted bindings can result in a dangerous ski experience, potentially leading to falls and injuries. Binding failure can occur during a ski run if the adjustment is not correct.
- Wastage of Time: If the equipment is not properly selected or maintained, the adjustment process can be prolonged and inefficient.
Importance of Proper Tool Selection and Maintenance
Selecting the right tools and ensuring their proper maintenance are crucial for safe and effective ski binding adjustment.
- Safety First: The right tools are critical for ensuring safe adjustment. Using the correct wrench for the binding model prevents damage to the binding, minimizing the risk of injury. Always check for any damage or defects before use.
- Precision and Accuracy: Proper tools allow for precise adjustments, ensuring that the binding is correctly set for the rider’s weight and boot size. This is paramount for ski safety.
- Extended Tool Lifespan: Regular maintenance, such as cleaning and lubrication, prolongs the life of the tools, ensuring they remain in optimal condition for future use. This helps avoid costly replacements.
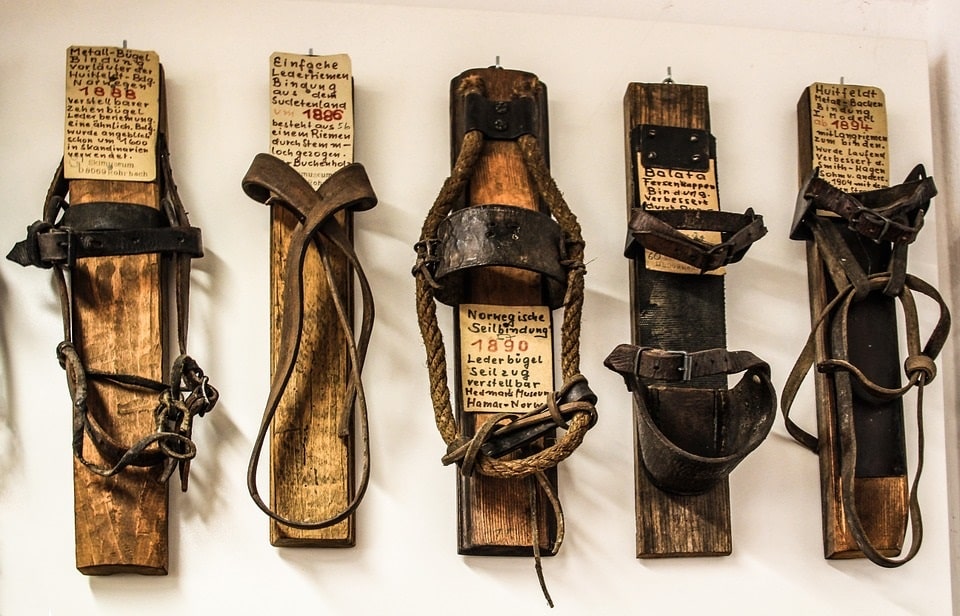
Identifying Ski Binding Components
Understanding the components of your ski bindings is crucial for safe and effective adjustments. Proper identification allows you to pinpoint the specific elements requiring attention and ensures you’re working on the correct parts. This knowledge empowers you to make informed decisions throughout the adjustment process.
Key Binding Components
Ski bindings are intricate systems, composed of several interacting parts. These components work together to securely hold your boot to the ski while allowing for controlled release in case of a fall. Understanding their individual roles is vital to successful binding adjustment.
Types of Toe Pieces
Different ski bindings feature varying toe-piece designs, each tailored to specific performance characteristics and rider preferences. The design impacts the overall stiffness and feel of the binding. Understanding these differences helps you select the appropriate adjustment tools and techniques. Some toe pieces are designed for more aggressive skiers, offering more rigidity and support. Others prioritize a softer feel, providing greater comfort and responsiveness. A common example is the difference between a DIN setting of 10 and 12. The 12 setting will provide more support and will likely be more stiff.
Binding DIN Settings
The DIN setting, often represented by a number, determines the binding’s release characteristics. Higher DIN values indicate a stronger hold and greater resistance to release. This setting directly correlates with the force needed to trigger the release mechanism. Skiers with different experience levels and preferences may use different DIN settings, for instance, a beginner may use a DIN setting of 6 or 8, whereas an experienced racer may use a DIN setting of 12 or 14. Understanding the appropriate DIN setting for your skiing style is essential for safety and performance.
Binding Heel Pieces
Heel pieces are integral components of ski bindings, responsible for securing the heel of your boot to the ski. These components are often designed with different release mechanisms and adjustment options, allowing for customization to your specific boot and skiing style. Heel pieces often have a mechanism for adjusting the vertical angle of the binding.
A Detailed Overview of Ski Binding Components
| Component | Location | Function | Adjustment Details |
|---|---|---|---|
| Toe Piece | Front of the binding | Secures the front of the boot to the ski | Adjustment typically involves DIN setting and potential toe piece angle adjustments |
| Heel Piece | Back of the binding | Secures the heel of the boot to the ski | Adjustment typically involves DIN setting and potential heel piece angle adjustments |
| DIN Setting | Embedded in the binding | Determines the release force | Adjusted using specific tools, often found on the binding itself. |
| Release Mechanism | Within the toe and heel pieces | Controls the release of the binding in case of a fall | Generally, no direct adjustment is made, rather the mechanism is set via DIN settings. |
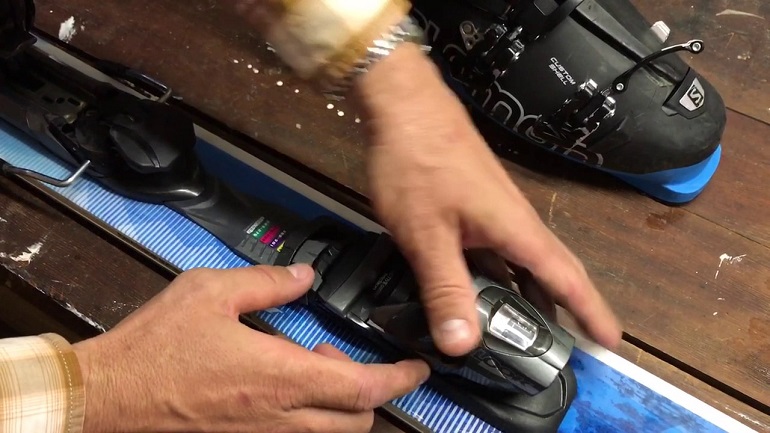
Basic Adjustment Procedures

Proper ski binding adjustment is crucial for both performance and safety on the slopes. Incorrectly adjusted bindings can lead to injuries, while correctly adjusted bindings ensure optimal control and responsiveness. This section details the step-by-step process for adjusting your ski bindings, along with the effects of various settings.
Step-by-Step Adjustment Procedure
Understanding the precise steps for adjusting ski bindings is vital for safe and efficient use. Each step involves specific actions and precautions to avoid potential hazards.
- Verify Ski Binding Compatibility: Before beginning any adjustment, confirm the binding’s compatibility with your ski model. Mismatched bindings can lead to instability and decreased performance, potentially resulting in safety concerns. Consult the manufacturer’s instructions or a qualified technician if you are unsure about the compatibility.
- Prepare the Ski Binding Tools: Gather the necessary tools, including the appropriate binding adjustment tool (e.g., a binding spanner, a specific tool from the manufacturer, or a binding adjustment wrench). Ensure the tools are in good condition to prevent damage or inaccurate measurements.
- Identify Adjustment Settings: Familiarize yourself with the different adjustment settings on your ski bindings. These settings typically control the release angle, the toe and heel release, and the overall stiffness of the binding. Each setting is crucial for tailoring the binding to your specific needs.
- Adjust the Release Angle: Precise adjustment of the release angle is essential for a controlled release in case of a fall. The release angle dictates the point at which the ski binding will release from the ski boot. Adjust the release angle according to the manufacturer’s recommendations and your weight. Incorrect release angles can compromise safety.
- Adjust the Toe and Heel Release Settings: Carefully adjust the toe and heel release settings to the manufacturer’s recommendations and your weight. These settings regulate the force needed to release the ski binding from the boot. Overly stiff bindings can result in injuries, while overly loose bindings can result in loss of control. Always refer to the manufacturer’s instructions.
- Check for Binding Stiffness: Verify that the binding stiffness matches your weight, skiing style, and the terrain you intend to ski on. A binding that is too stiff can cause discomfort and potential injury, while a binding that is too loose may not provide adequate support.
- Test the Binding Functionality: After completing the adjustments, perform a functional test of the bindings. This involves gently applying pressure to different parts of the binding to ensure the release mechanism functions as intended. This step is crucial for confirming the safety and effectiveness of the adjustments.
Safety Procedures
Adhering to safety procedures is paramount during ski binding adjustment. Improper procedures can lead to potential hazards and injuries.
- Wear Appropriate Safety Gear: Always wear safety glasses and gloves during the adjustment process. This protects your eyes and hands from potential injuries.
- Work in a Safe Environment: Choose a stable and well-lit area for the adjustment process to minimize risks.
- Consult Manufacturer’s Instructions: Always refer to the manufacturer’s instructions and diagrams for specific adjustment procedures and recommended settings.
- Seek Professional Help if Necessary: If you are uncertain about any aspect of the adjustment process, seek professional help from a qualified ski technician.
Adjusting DIN Settings

Proper DIN setting adjustment on ski bindings is crucial for both safety and performance. Incorrect settings can lead to a binding failing to release when necessary, resulting in serious injury. Conversely, overly aggressive settings can impede skiing enjoyment by making turns feel stiff or unresponsive. Understanding the DIN setting scale and its implications is paramount for any skier.
Importance of DIN Settings, How to adjust ski bindings
DIN settings, or Dynamically Independent Numbers, are a critical component of ski binding adjustment. These settings determine the amount of force required to trigger the binding’s release mechanism. A higher DIN setting corresponds to a greater force needed for release, suitable for more experienced skiers with more aggressive skiing styles. Conversely, lower settings are more appropriate for beginners or skiers engaging in less demanding terrain.
Implications of Incorrect DIN Settings
Incorrect DIN settings can have significant implications for safety and performance. Under-adjusted settings might not provide adequate release in a fall, leading to severe injuries. Over-adjusted settings, while potentially safer in certain situations, can hinder skiing performance by making turns stiff and unresponsive. The choice of DIN setting is crucial to balance safety with performance.
DIN Setting Adjustment Table
| DIN Setting | Description | Recommended Use Case | Potential Risks |
|---|---|---|---|
| 10 | Low setting, minimal force for release | Beginners, gentle slopes, learning new skills | Increased risk of injury if the binding doesn’t release as intended on steeper slopes or during more forceful maneuvers. |
| 12 | Moderate setting, suitable for intermediate skiers | Intermediate skiers on groomed slopes, some off-piste | Increased risk of injury if the binding doesn’t release appropriately, particularly on challenging terrain. |
| 14 | Higher setting, suitable for advanced skiers | Experienced skiers on varied terrain, including challenging off-piste runs | Increased risk of the binding not releasing if not adjusted precisely to the skier’s skill level and terrain. Also, increased risk of discomfort from the stiffness of the binding. |
| 16 | High setting, for expert skiers on challenging terrain | Expert skiers on challenging off-piste terrain, extreme skiers | Increased risk of binding failure, especially if the setting is too high or if the terrain is unpredictable. |
Method for Adjusting DIN Settings
The DIN setting is typically adjusted by turning a dial or knob on the ski binding. The specific method varies depending on the binding model. Consult the manufacturer’s instructions for the precise steps. Always prioritize accurate and safe adjustment, as incorrect adjustment can lead to serious injury. Carefully verify the DIN setting on the binding corresponds to the intended use and ski conditions. Skilled professionals should be consulted if needed.
Troubleshooting Common Issues

Adjusting ski bindings correctly is crucial for safety and optimal performance. However, occasional issues can arise. Understanding common problems and their causes allows for prompt and effective diagnosis and resolution, preventing potential accidents and ensuring enjoyable skiing experiences.
Troubleshooting ski binding problems involves a systematic approach, starting with careful observation and progressing to targeted solutions. This section details potential issues, their underlying causes, and the recommended solutions, enabling skiers to maintain the safety and efficiency of their bindings.
Identifying Common Ski Binding Problems
Common ski binding problems frequently stem from incorrect adjustments, wear and tear, or external impacts. These issues can lead to binding malfunction and compromise safety during skiing. Knowing how to diagnose and resolve these problems is essential for preventing accidents and maintaining ski performance.
Analyzing Ski Binding Malfunction
A structured approach to diagnosing ski binding issues is essential. This involves checking for obvious signs of damage, improper adjustments, and signs of wear. Careful examination is crucial for determining the root cause and selecting the correct repair strategy.
Troubleshooting Table
| Issue | Possible Cause | Solution | Prevention |
|---|---|---|---|
| Binding feels too loose or too tight | Incorrect DIN setting, worn components, or damage to the binding mechanism | Re-adjust the DIN setting according to the skier’s weight and skill level. Inspect the binding components for wear or damage. Replace worn parts as needed. | Regularly inspect binding components for signs of wear. Adjust DIN settings appropriately for changing conditions or skier characteristics. |
| Binding will not release | Bent or damaged release mechanism, incorrect DIN setting, or foreign object lodged in the release mechanism. | Thoroughly inspect the release mechanism for any signs of bending or damage. Ensure the DIN setting is appropriate for the skier. Clean any foreign objects lodged in the release mechanism. Consider replacing damaged parts. | Regularly check the release mechanism for proper functioning. Avoid impacts that could bend or damage the release mechanism. |
| Binding release is inconsistent or erratic | Worn release components, incorrect DIN setting, or damaged release mechanism. | Inspect all release components for wear and tear. Adjust the DIN setting for appropriate performance and safety. Replace worn components if needed. Check for any damage or obstructions in the release mechanism. | Regularly inspect all release components for wear. Maintain the DIN setting based on current conditions and skier characteristics. |
| Ski slips out of the binding | Binding is too loose, ski boot is not properly fitted, or worn or damaged components. | Adjust the binding for a snug fit. Ensure the ski boot is properly fitted to the ski. Inspect binding components for damage or wear. | Regularly check the fit of the ski boot and binding. Maintain proper DIN settings. |
Diagnosing and Resolving Issues
Diagnosing ski binding problems involves a methodical approach. First, assess the ski binding for visible damage or signs of wear. Next, check the DIN setting for proper adjustment. If issues persist, consult a qualified ski technician for further evaluation. Ignoring or overlooking these problems can lead to serious injuries during skiing.
Safety Considerations During Adjustment

Proper ski binding adjustment is crucial for safe skiing. However, improper adjustment can lead to serious injuries. Understanding potential risks and implementing appropriate safety precautions is paramount. This section Artikels essential safety considerations to ensure a secure and injury-free adjustment process.
Safety Precautions During Adjustment
Careful attention to safety procedures is essential during ski binding adjustment. This involves not only the techniques employed but also the environment and tools used. Failure to adhere to safety precautions can result in injury to the technician or the skier.
Potential Risks and Mitigation Strategies
Accidents during ski binding adjustment can stem from various factors. Identifying these risks and implementing preventive measures is key to a safe adjustment process. The table below details potential risks, their causes, preventive measures, and mitigation strategies.
| Risk | Cause | Prevention | Mitigation |
|---|---|---|---|
| Injury to technician (e.g., hand injury) | Improper tool handling, insufficient grip, forceful application of tools, improper lifting techniques. | Use appropriate tools and ensure they are in good condition. Employ proper gripping techniques and tool usage. Ensure a stable, secure work surface. | Wear appropriate safety gloves, eye protection, and other protective gear. Use caution when handling tools. Work in a well-lit area with a secure workspace. Seek assistance if needed. |
| Ski binding damage | Improper use of tools, excessive force, incorrect adjustment procedures. | Follow manufacturer instructions carefully. Use the correct tools for the task. Avoid excessive force during adjustment. | Double-check measurements and settings. If unsure, consult a professional. Use appropriate lubrication techniques. |
| Ski binding malfunction during skiing | Incorrect DIN setting, inadequate adjustment, damaged parts. | Adhere to DIN setting recommendations based on skier weight and ability. Thoroughly inspect all components before adjustment. Ensure proper lubrication. | Regularly inspect ski bindings for signs of damage or wear. If there is any doubt about the adjustment, consult a professional. |
| Injury to skier (e.g., leg injury) | Binding malfunction during skiing, improper DIN setting for skier’s weight and ability. | Ensure correct DIN setting. Thoroughly check for binding function before skiing. | Consult with a ski professional for recommendations if needed. Check for any signs of damage before use. |
Importance of Safety Gear
Wearing appropriate safety gear is crucial for protecting against potential hazards during ski binding adjustment. This includes, but is not limited to, safety glasses, gloves, and sturdy work boots.
- Safety Glasses: Eye protection is vital to prevent injury from flying debris or sharp objects during the adjustment process. Always wear safety glasses or goggles when working with tools or components.
- Gloves: Gloves provide protection against cuts, abrasions, and other hand injuries that may occur while handling tools or components. Choose gloves that offer a good grip and provide adequate protection.
- Sturdy Work Boots: Sturdy work boots provide support and protection for the feet during the adjustment process. This is particularly important when working on a potentially uneven or slippery surface.
Advanced Binding Adjustment Techniques
Beyond basic adjustments, advanced techniques delve into the nuances of specific binding systems and address more intricate scenarios. Mastering these methods allows for precise tuning and optimal performance, crucial for skiers seeking the most efficient and controlled experience. Understanding the variations between binding systems is vital for accurate and safe adjustments.
Different Binding Systems
Ski bindings employ various systems, each with unique features and adjustment methods. Understanding these distinctions is paramount for accurate and safe adjustments. Different systems are designed for varying ski types and rider preferences. For instance, bindings designed for all-mountain skiing might feature different adjustment mechanisms than those for alpine racing.
Comparative Analysis of Binding Systems
| Binding System | Technique | Tools Needed | Potential Issues |
|---|---|---|---|
| Marker Kingpin | Requires precise adjustment of the release lever and toe piece to maintain the DIN setting. Precise tightening is critical. | Specific Marker Kingpin tools, including a DIN setting gauge, are essential. | Misaligned components can lead to inconsistent release or premature release. Over-tightening can damage components. |
| Look | Adjustments often involve precise tightening and releasing of the lever mechanism. Precise DIN setting is critical. | Look-specific tools and DIN setting gauge are needed. | Improper tightening can lead to inconsistent release or failure. Incorrect DIN setting may result in unexpected release. |
| Salomon | Usually involves adjusting the lever and toe piece using specific tools. Accurate DIN setting is paramount. | Salomon-specific tools and DIN setting gauge are necessary. | Misalignment of components can cause inconsistent release or unintended activation. Incorrect DIN settings can affect release performance. |
| Fischer | Adjustment may involve precise tightening of the release mechanism and alignment of the toe piece. | Fischer-specific tools and DIN setting gauge are needed. | Inadequate tightening can result in inconsistent release. Improper alignment can lead to early or delayed release. |
Complex Adjustment Scenario
Imagine a skier experiencing inconsistent release with their Marker Kingpin bindings. After checking for obvious wear and tear, the binding adjustment reveals a slight misalignment in the release lever. The DIN setting appears correct on the gauge, but the release is inconsistent. Using a precise torque wrench, the technician realigns the release lever, ensuring proper engagement with the toe piece. After thorough testing, the inconsistent release is resolved. This example highlights the importance of meticulous attention to detail in advanced binding adjustments. The process necessitates a deep understanding of the specific binding system and appropriate tools.
Ski Binding Maintenance: How To Adjust Ski Bindings

Proper ski binding maintenance is crucial for ensuring optimal performance and safety. Regular checks and care prevent unexpected malfunctions, extending the lifespan of your bindings and reducing the risk of accidents on the slopes. Neglecting maintenance can lead to compromised safety features and potentially dangerous situations.
Maintaining ski bindings involves a series of routine checks and procedures. This encompasses everything from visually inspecting the components for wear and tear to performing adjustments and replacements as needed. Consistent maintenance not only enhances safety but also contributes to the longevity of your equipment.
Frequency of Maintenance Checks
Regular inspection and maintenance of ski bindings are essential. The frequency of these checks depends on the usage patterns and the type of terrain you ski on. For frequent skiers, especially those who ski on challenging terrain, weekly or bi-weekly checks are recommended. Less frequent skiers can maintain their bindings monthly or quarterly.
Maintenance Checklist
This checklist Artikels the key steps for maintaining ski bindings. Adherence to this checklist helps to ensure comprehensive and thorough maintenance.
- Visual Inspection: Carefully examine the binding components for any signs of damage, such as cracks, dents, or loose screws. Look for excessive wear on the metal parts and the plastic parts. Inspect the DIN setting indicator for proper adjustment and clarity.
- Check DIN Settings: Verify that the DIN setting is appropriately adjusted to your weight and skiing ability. Ensure the settings are clearly visible and free from obstructions.
- Lubrication (if necessary): Lubricate moving parts with a specialized ski binding lubricant. This helps maintain smooth operation and prevents sticking or seizing.
- Cleanliness: Remove any snow, ice, or debris from the binding components. This helps to prevent corrosion and ensure accurate functioning.
- Component Check: Inspect the buckles and straps for proper alignment and functionality. Check that the binding is properly mounted on the ski.
- Functionality Test: Perform a basic functionality test. This involves attempting to flex the ski bindings in a controlled manner to check for smooth operation and any obstructions.
Preparing Ski Bindings for the Next Season
Preparing your ski bindings for the next season involves a more comprehensive approach than just a quick maintenance check. Thorough cleaning, lubrication, and inspection will ensure optimal performance and extend the life of your bindings.
- Deep Cleaning: Disassemble the bindings and thoroughly clean all components using a specialized cleaning solution. Pay close attention to the metal parts, ensuring they are completely free of debris.
- Lubrication: Apply a fresh layer of lubricant to all moving parts, ensuring even coverage. This prevents friction and improves performance.
- Component Replacement: Replace any worn or damaged components. This includes straps, buckles, or any other parts showing signs of wear. Note any areas that require replacement and replace as needed.
- Professional Inspection: Consider taking your bindings to a professional ski technician for a comprehensive inspection. This ensures that all components are functioning correctly and that the bindings are in top condition.
FAQ Insights
How to adjust ski bindings – What are the most common tools needed for adjusting ski bindings?
Common tools include a binding adjustment wrench, a DIN setting tool, and potentially a screwdriver, depending on the binding type. Always check the manufacturer’s recommendations for specific tools.
What are the potential risks of improper DIN setting adjustment?
Incorrect DIN settings can lead to ski bindings failing to release properly in a fall, potentially causing serious injury. Conversely, settings that are too loose can compromise the connection between your skis and boots, leading to a loss of control.
How often should ski bindings be maintained?
Regular maintenance, at least once a season, is recommended to ensure optimal performance and safety. This includes checking for wear and tear, lubrication, and functionality.